Showing posts with label Frames. Show all posts

Tuesday, September 20, 2011

Photo display or Message board

So I think you are getting the point that I am obsessed with burlap. Im not sure what it is.. Maybe that Fall is around the corner and something about it reminds me of the holidays. I dont know, but whatever it is.. I LIKE IT!

My sisters birthday was yesterday and she is getting a gift that I made... Plus a few knick-knacks.. but she has a new apartment. When I visited I noticed she had lots of photos up on the wall. Idea?? Yes!! Photo display of some sort I thought to myself.
So here is what I came up with.
 I started out with a large frame from Goodwill. Half off!! Can I getta woot woot! I also picked up 2 photos with frames from Dollar Tree! Great place to get simple frames, btw!!

(Total $5)
Remove the photos from the frames.

Prep them. I lightly sanded the wood one on the left, but the other two were metal and plastic so they were good.
Spray Paint (Rustoleum Heirloom White)
I had to do two coats on the wood one because the grains were showing a little more than I wanted. Probably could have been prevented by using a primer, but hey.. Im impatient!

Let those dry...

Got the burlap?

Ok I used the cardboard that was already on the large frame, but if glass came with yours, thats ok too! Do the same thing.

Ok.. So lay your glass or cardboard over the burlap, cut the burlap an inch bigger on each side.
Here is the fun part.. not.. well kinda..

Apply Spray adhesive to the cardboard or glass. Flip it over onto the burlap making sure its pretty even on all sides. YAY!!

Glue the edges with a glue gun to the back of the glass or cardboard.
This is what it looks like done. Right side up of course!

Check on your frames...
Dry??
Ok.. Time for fun. Sand the edges for distressing, if you like.. I LIKE LIKE!!
Apply a antiquing glaze. I still have yet to pick up RL, but love this one too! Valspar Antiquing glaze. Wipe on and wipe off!
LOVE

Distressed with glaze
Apply the burlap covered cardboard or glass back onto the frame. It may be a smudge tight because of the added width of the burlap, but you can do it! promise! If I can, you can!

Ta-DAh
Done! Now for the actual fun part!
Get that glue gun hot and those painted dollar frames close! Line them up how you like them and where you want them to go. I wanted my main frame vertical so I set them up to suit that look. Hot glue the corners and apply. Let dry! Quick, huh?!
It looked a little dull by itself so I added some keys I got from Michaels for $1 each!! In the $ section up front!
$1.88 for 4 at Walmart in the office area.
You can choose to paint these too! Fun colors like teal or lagoon blue by rustoleum would be awesome or even Red!? Hmm.. Depends on the decor and your taste! My sisters apartment is new to the decorating so I figured I would keep it neutral for her. Plus the metal gave it some texture! Apply with hot glue inside the smaller frames where the pics are going to be held...

And DONE!
Hang with beautiful pictures and you are set! I am totally making an extra large one for my living room. Once I find a frame big enough! But what a great gift.. You could even include the pics in the gift!
Complete!
Could even be a cute message board. Maybe add corkboard to the back and cover with burlap! Hmm.. Idea!!
Anyway. I hope you like! Have fun making yours!

Linked to:
Addicted2Decorating
Crafty, Scrappy, Happy (that's me). 
Coastal Charm 
Project Queen

Sunday, August 21, 2011

Amazing find from an estate sale

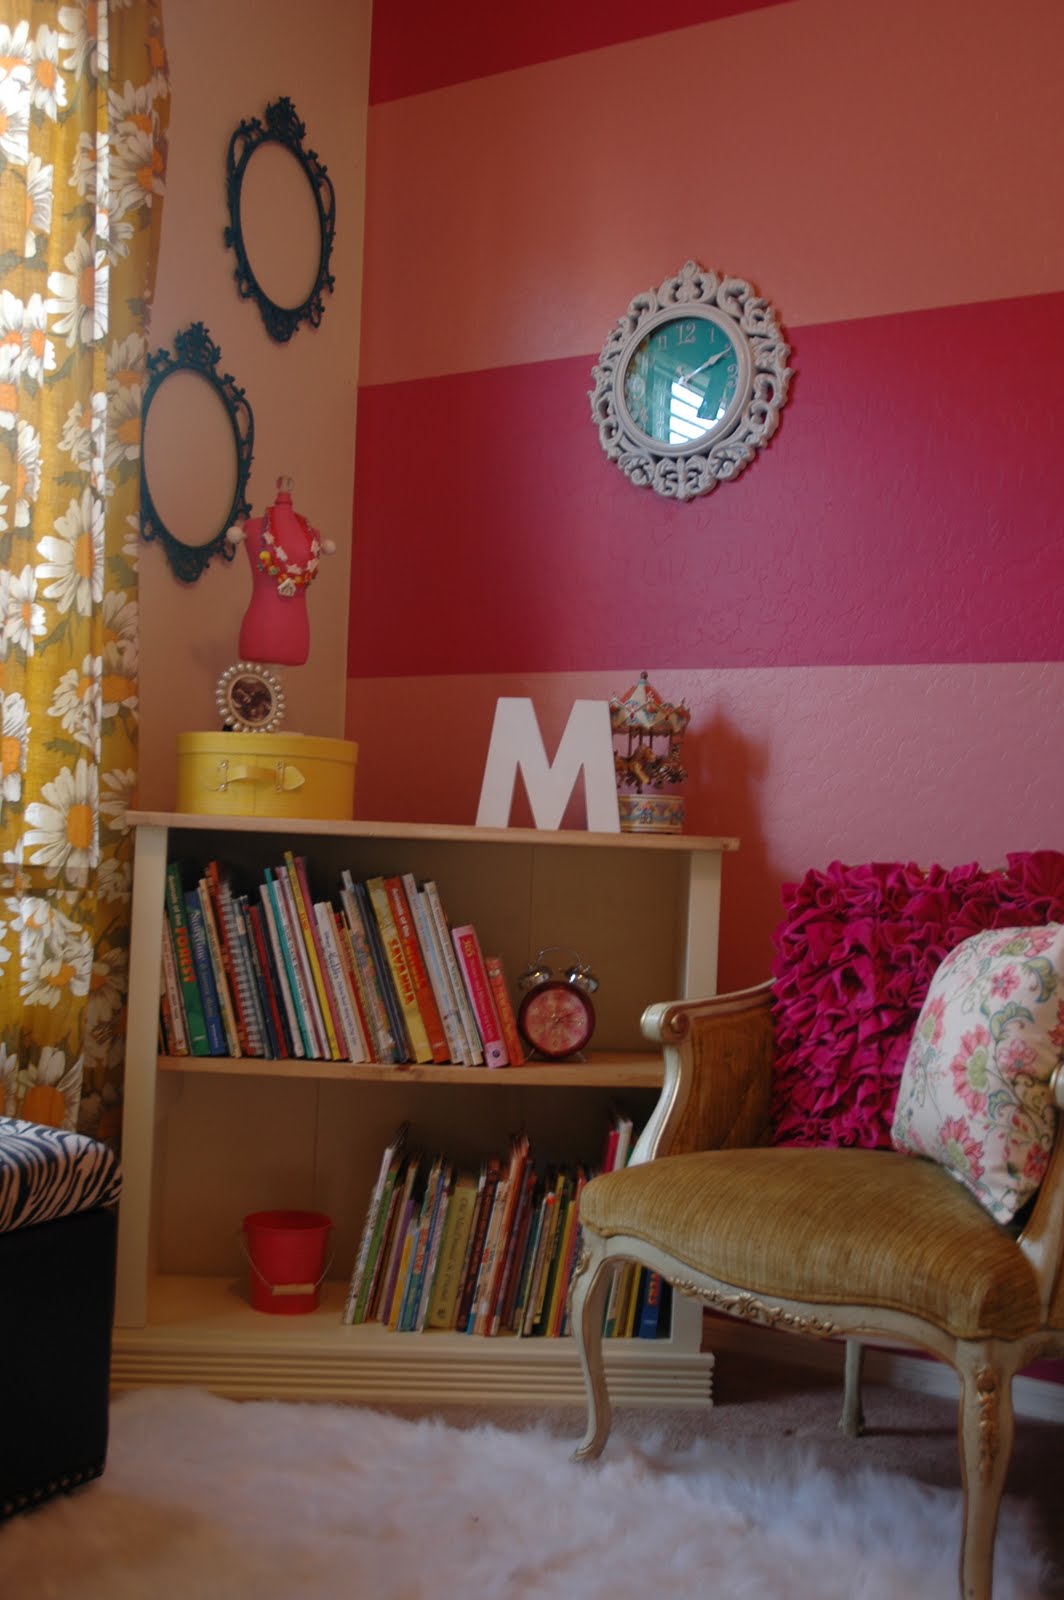
This past week we took our little angel to visit with family. It was a much needed getaway and time needed to spend with loved ones. During our stay with my amazing grandparents, my grandma found an estate sale that was just down the street from her. I love her area in California. Its so cute and so close to the beach, so you can imagine how her home and all the others are.. Beautiful and comfy! Well anyway, We were determined to be there early, so I slipped out as the hubs and princess were fast asleep. We made it to the sale right on time, but there were people already there. Wow! So we were hunting around, and I thought maybe we really weren't gonna find anything. But we started roaming around the house and what did we find on the wall in the bedroom?! YES, beautiful antique frames! Bubbles frames too! I have loved these type of frames, and have been looking for them all over the place. But new ones are made of plastic (at least at my price range) or I cant find them. What do you know? My grandma can haggle (this may be where I get it from) and we got them for $15 for the pair! So check out the transformation they have to get placed into my princess Madisyn's room!
Before: Aren't they gorgeous?!
Blue Lagoon in satin finish

I didn't feel a need to prime them as they wouldn't be handled too much. The spray paint will hold up well. I love this spray paint, 2x the coverage.
Love the detail it adds to her room


Ill eventually add some pics in the frame
These frames are lovely in her room! It completes her reading corner! I love it! So chic and girlie. I would love this room! Actually I often visit this area for a little reading time myself (childrens books of course, and to my sweetie pie).
See what you can paint to add a bit of color to your decor!! Its fun, promise!!
Come back soon. I have an awesome bookcase redo that will let you know how to make your old and dated bookcase look new!
Check out this blog at Southern Hospitality for more great finds!