Monday, January 16, 2012

Revamped hutch for a new revamp[ing] office..

We have finally started the journey to creating our own office!!

 I am so excited and have been gathering ideas for it for the past month! Woo hoo for Pinterest! The time sucker of my evenings!

Mr. S has some say into what design we are going to commit to. We both will be using it so a little manly with a little bit of girlie = our future office..
Wasnt that detail enough??!
No?

Oh.. Uhm.. Ill keep posting but at the end of this post Ill put up my pinterest link of some inspiring photos I want to achieve and am using for this office space!!

Work with me.. its a lot of stuff..

First we started with a Hutch. Now I am on a budget, who isn't these days right, so I am hunting everywhere for sweet deals. Anywho, I was determined to find a hutch in that would fit in that little room, mainly for space saving storage. Then once I was looking for inspiration for color, I found one hutch that resembled what I was going for.. Colonial RED peeps!! Yes-sir-ee! That will be the focal point and boy am I happy with how it turned out!!!

Here is how it went!

Before
Uhm.. yea.. little dinged up.. but salvagable
EEWW.. look at those spindles on the shelves..can you say dated?!
After:
uhm.. yes!! (p.s. that paint on the walls will be old news)
It is a lot more toned down than this pic
Loved the scrolly handles.. and then I got 4 new rounds ones to balance the detail.


Steps:
#1: Clean and sand as good as you can. (Uhmm I had to sand the top down a ton because when I saw it on CL (whoot, and amazing deal) she said it was solid wood and had a few scratches and dings.. no biggy right?? Well it was veneer on the top counter..what the??.. (everything else was solid wood.) So a tip for that... sand it till its smooth and dont sand to hard or deep, that will end up showing the "cheap" wood underneath.. and that can be difficult to cover up. Clean off again.

#2: Prime away..(after you have removed the hardware and doors.) I use uh... Zeisser (spelling, im too lazy to go to the garage to see) it works great for anything, and it actually can be used on anything that has a varnish without sanding... it does work on that, but I wanted to make sure this red spray paint wasnt going anywhere! So sand before hand.. please!

#3: Once that is dry you are set to start painting. Spray painting is easy, i choose spray paint this time because I didnt want to deal with trying to match up the paint to a gallon paint for my spray gun.. no thanks.. easy please! plus I was in a hurry to see the end result..

#4 after several layers of light spray painting...here is a good blog with a video how-to. Or just read the spray can!! Duh me..

#5 let it dry for a whole day or longer.. This helps the paint "cure"... (what other word is there for letting it dry completely??)
Anyway.. Let it dry and glaze per your preference.. Wipe on, wait, wipe off.. (this helped tone the bright red down to a calmer more sophisticated red)

#6 Put your doors and hardware back on...and...Admire!
Pretty simple and took 2 1/2 days. The drying time and the fact that I was working on the computer desk for the same room made the day and a half I had planned, worth it.. I got two projects done. Each while the other was drying.. heeeyyy-oo! Like!


Here are some pics, from my pinterest page,  for inspiration for this office/craft room redesign..

Linked to:
YATTM

Wednesday, January 11, 2012

End Table.. finished.. well Refinished!

Remember that end table I mentioned last week.

The one that I had a bet with my hubby to get done in a week!?! Well read about it here...

Here is the finished product!
 I love it!
I had originally planned to sell it, but now I am keeping it for myself.. Fits perfectly in my living room for the time being..


I had to sand the top all the way to the wood and restain it since it had some serious wear and markings on the wood before..

Started with some primer on the bottom half.
After it dried I painted 2 coats of Antique White (my fave) with some light distressing after that had completely dried.

The hardware didnt need to be changed, I thought it actually fit the piece pretty well.

2 coats of dark walnut stain, a coat or two of poly and it was ready to be used!

I am very happy with how it turned out. and the drawers.. so awesome! Its just one big drawer and perfect to hide those magazines, remotes and whatever else you try and hide when guest show up out of the blue.. well I never do that...umm.. yea (ALL THE TIME)

Hope you like it as much as I do!
Here are the before and the after pictures!!


Before. Potential, right!?

Love this stain!!
Knobs seemed to fit right in.
And AFTER!


Wednesday, January 4, 2012

Old brass light to chic chandelier

Hey all! Happy New Year! Its 2012, can you believe it?

Wow! I hope the holiday season was amazing for everyone! It sure was here!

Well with a new year comes new projects. I finished up most of the projects I had laying around but one..

And that one will be finished here shortly.. It was a bet with Mr. S that I lost terribly..

While we had a date night we ran into a GW. I love going to them on date nights, since I can quickly eye the entire store and not worry about my little one getting antsy on me..
Well in the furniture location of GW I found a lovely side table.. hmm.. WILL BE!!

Anyway.. the hubs made a bet that if I could refinish it in a week I could get another piece as soon as I was finished.

Yippee.. Piece of cake.. right?!

WRONG!

The same week I started, my little angel came down with an extremely high fever and ear infection..and since this was the first time she has been sick her entire 19 months of living, it was a big deal to me! So.. that lasted an entire week practically.

Then to add to the already sick week with a little one, I ended up with laryngitis which led to the worst sinus infection..  I guess I can say the worst because it was my first ever!!

So nuff said.. I didnt win.
But that will be done this week, Fo- Sho!

Alright.. My quick one day chandelier transformation..

Found at GW! YAY! Love that place!
 and for.. guess how much..


guess..
$3!!!
woot woot!
 yep I think I jumped up and down.

I even told my husband guard the cart while I rushed my angel to the ladies room..

So a little degreaser, light sanding, and spray paint and some serious jig-a-roo from my hubby to put it up (He seriously worked some magic here with parts from another chandelier) and we had a new light in our closet for $3 plus the bulbs so $6..
Love the frosted soft white bulbs.

Can you say awesome!! I love it!
Now to get to that side table!

Saturday, December 10, 2011

Mantel is up!!!

Hey there!!

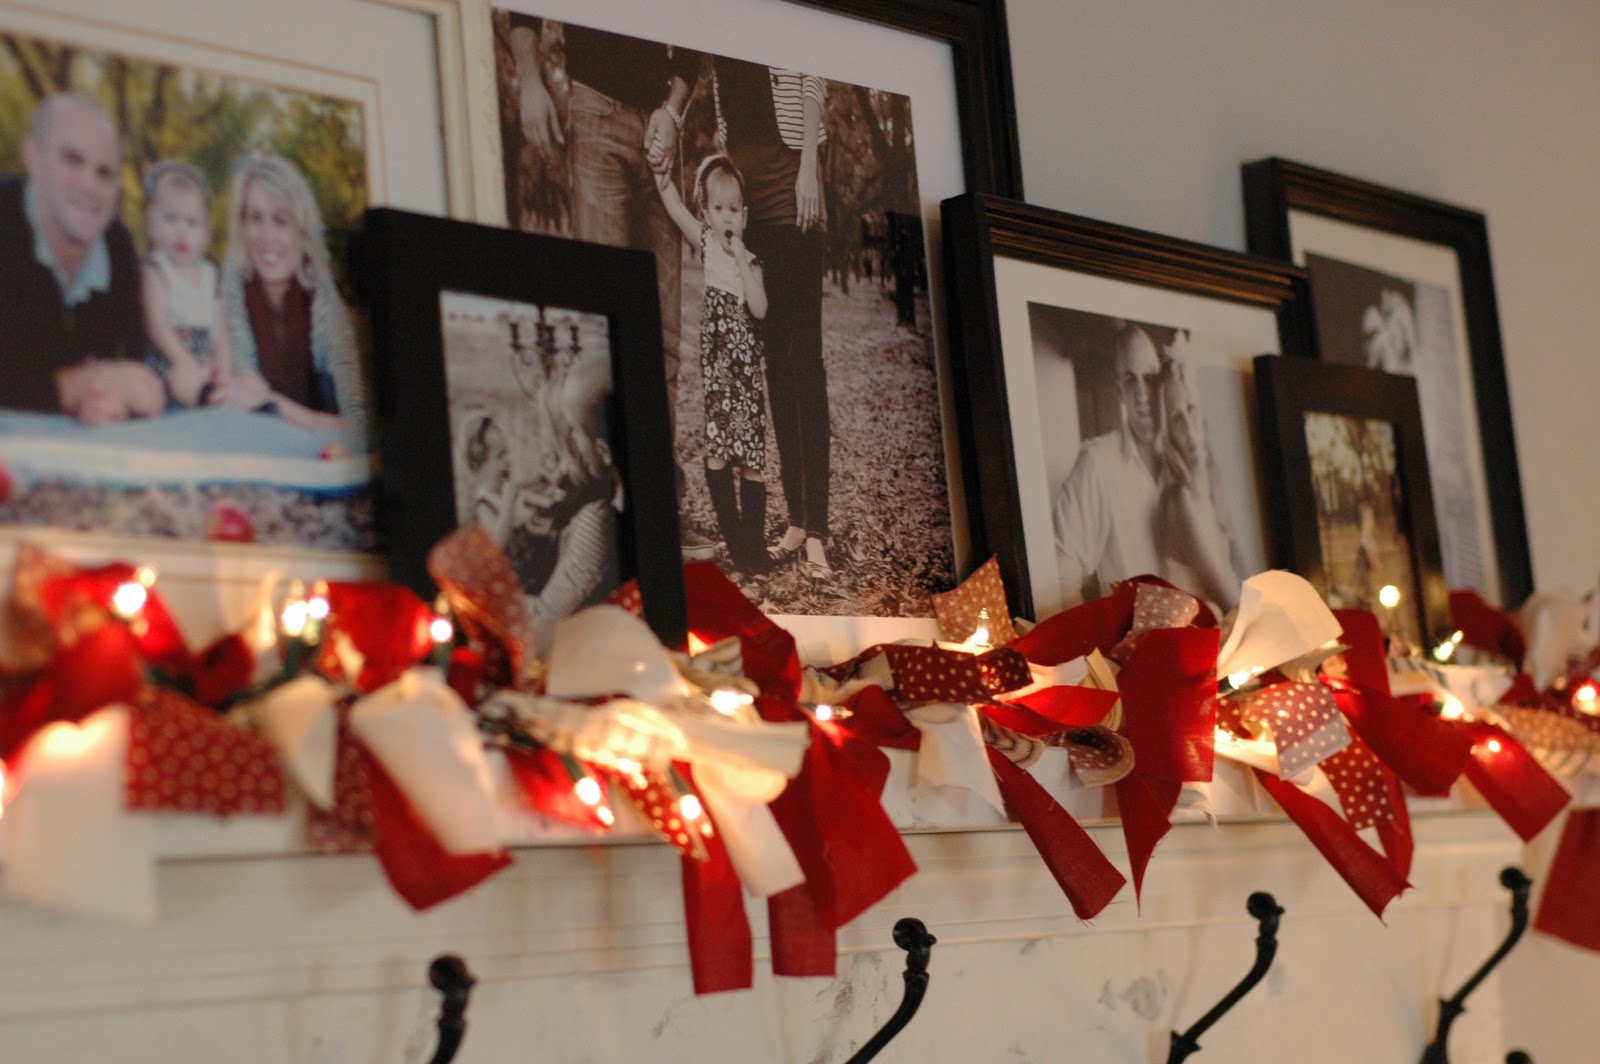
I have been waiting to put pics up of our mantel... and it is finally up and decorated for the holidays!

I LOVE IT!!
We don't have a fireplace.. but love mantels and the fun decorating you can do with them during the changing seasons! So here is my take on the fireplace mantel decor!

BTW.. The mantel idea was from Shabby-2-chic's blog.. They used it for an entry way shelf to display pics! Check it out if you want to make one for your home!

Without further delay...
 Here it is!

Perfect place for all my family photos!
Love the hooks!! Hobby Lobby peeps, where else?!
wrag garland wrapped around christmas lights.
Love christmas! This is perfect decor for my home!
P.S. Dont mind the areas that look wet. Its because they are. Had to fill the screws and paint..

Tuesday, December 6, 2011

Table refinished.. and love it!

I have been looking for an end table for sometime now. Now, I know there are tons out there.. but I am picky with what I want and what I come up with in my mind..
So I hunt till I find it.
I needed something with a large top for drinks, books, games, kids stuff, etc.. well... as time went on...and nothing was appearing.....

...Until a trip to DI and I found this beauty!!

Started priming once again.. The wood was in pretty rough shape. But nothing some good sanding couldn't fix.

 
Love it! Drop leaf end table.. perfect for when its card game time with the hubs or crafts with the little one.. I can close it up to put next to the couch and still have loads of room for my morning coffee or evening cup of tea..
YES!!
Now to refinish it!! Hate the brown!!!


So here is the after!
Hope you like!

So I didn't even clean the floors before taking the pics I was too excited!

Sunday, December 4, 2011

Some more checked off the "To Do" list

As some of you read I had a long to do list for crafts and holiday decor on my previous post.. Well I happened to conquer some of them with a much needed ladies craft night! (a little help from the hubs with the kids, Thanks honey!)
Check it out.

Ruffle Pillows- Check!

Wrag garland- Check!

Stockings- Check! Those pics will be up shortly! I want to show them hung and not sadly laying down on a table waiting to be hung.. Poor things.. They deserve to be seen!
 Well..
ok..
Sneak Peek!


Christmas Tree painted by my little angel! Love it! and love pinterest for the idea!!

And a peek at our Christmas tree!
Please don't look at the paint in the back.. I was waiting for Mr. S to get home so he could move the tree!

We are completely getting in the holiday spirit this year! LOVE every second of it!

Wednesday, November 30, 2011

Holiday Craft Ideas... Some to make & some checked off the "To Do" list!

Hey everyone!!

I hope this finds you well.. and you had a wonderful Thanksgiving! We had lots of fun with family and friends! What a great time of year! Sigh...

I love this time of the year!

We finally put up all the fall decor and busted out the Christmas decorations! YAY!

LOVE- LOVE-LOVE Christmas! Who doesn't ? Seriously!

With all the holiday decorations going up, I always tend to donate some of the old hand me downs that we were given..
Well.. it helps decrease my 9 bins of Christmas stuff and it gives me an excuse to make some holiday stuff!

So here are some ideas!!!

TO MAKE:
Stockings
Ruffle Pillows
Coffee Filter wreaths for mirrors
Wrag garland
Tree Skirt
Canvas Pictures
Wood Frames

MADE:
Christmas wreath for front door
$10

 Small Chalkboard from frame
$1.10


Cute gift box
Made for less than $3.. Had most of the stuff.. Old box, little balls from $ tree, ribbon and spray paint!

Recipe/Pic Holder
Great gift idea

Mantel for stockings and decor on LR wall (IN LOVE) Idea came from Shanty-2-Chic's blog!! It looks just like it and I will post pics once I paint the wall its going on!!

Chalkboard coffee mugs
Definitely need to get a chalk pen!


 These are some of the simple ideas that I finally had a chance to conquer during nap times!
So excited to complete the "To Do" list so I can get my holiday decor in order and completed so we can enjoy this joyous time of year!
What have you made for the holidays? I would to see! Happy Crafting!